Configure your first project
In this guide, you will learn how to configure your first project using gridmo. Prior to completing this guide, ensure that you have successfully launched your first simulation. Additionally, please see below for links to useful resources:
- Reference: Dig into the details about gridmo's terminology, Nodes, Commands, and more.
- Templates: Use our templates which meet local grid code requirements and integrate with industry-standard modelling tools.
- YouTube: Check out our channel which contains practical examples.
Step 1: Create a new project
Navigate to the web application at app.gridmo.io and follow the prompts to sign in.
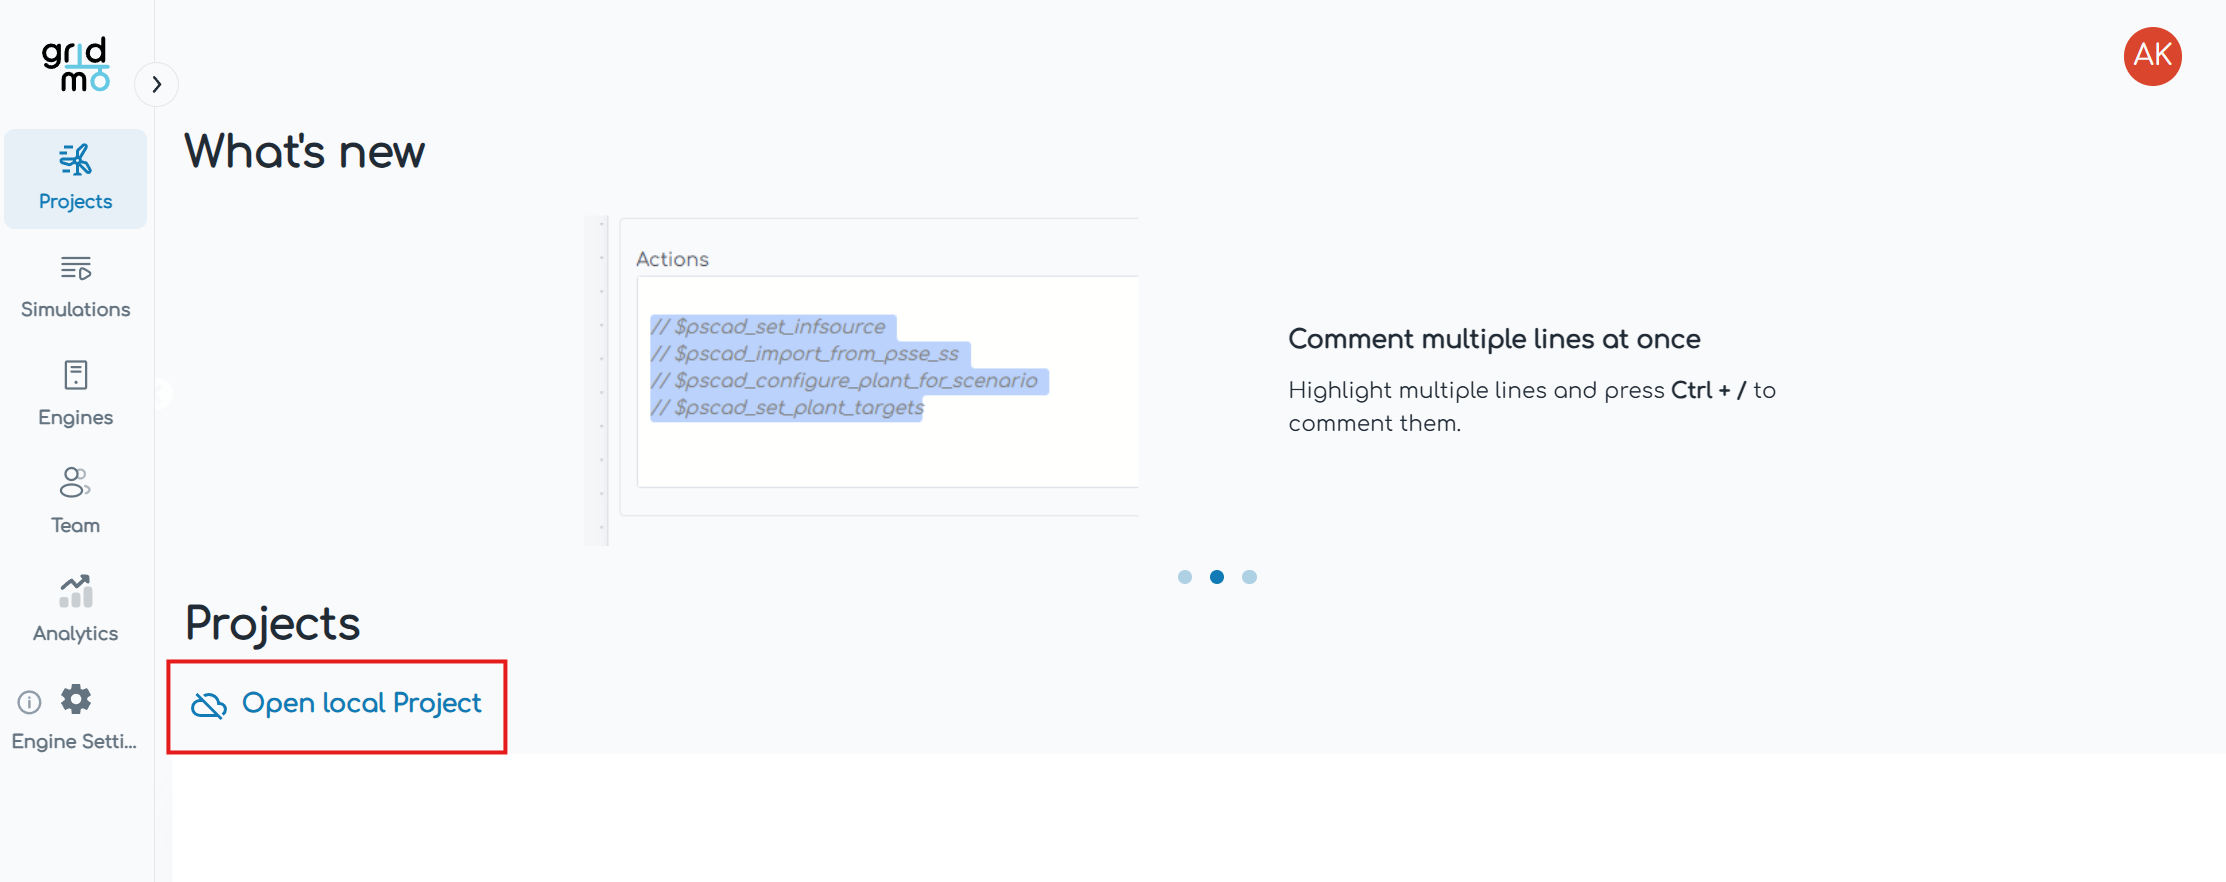
Select 'Open local project'.
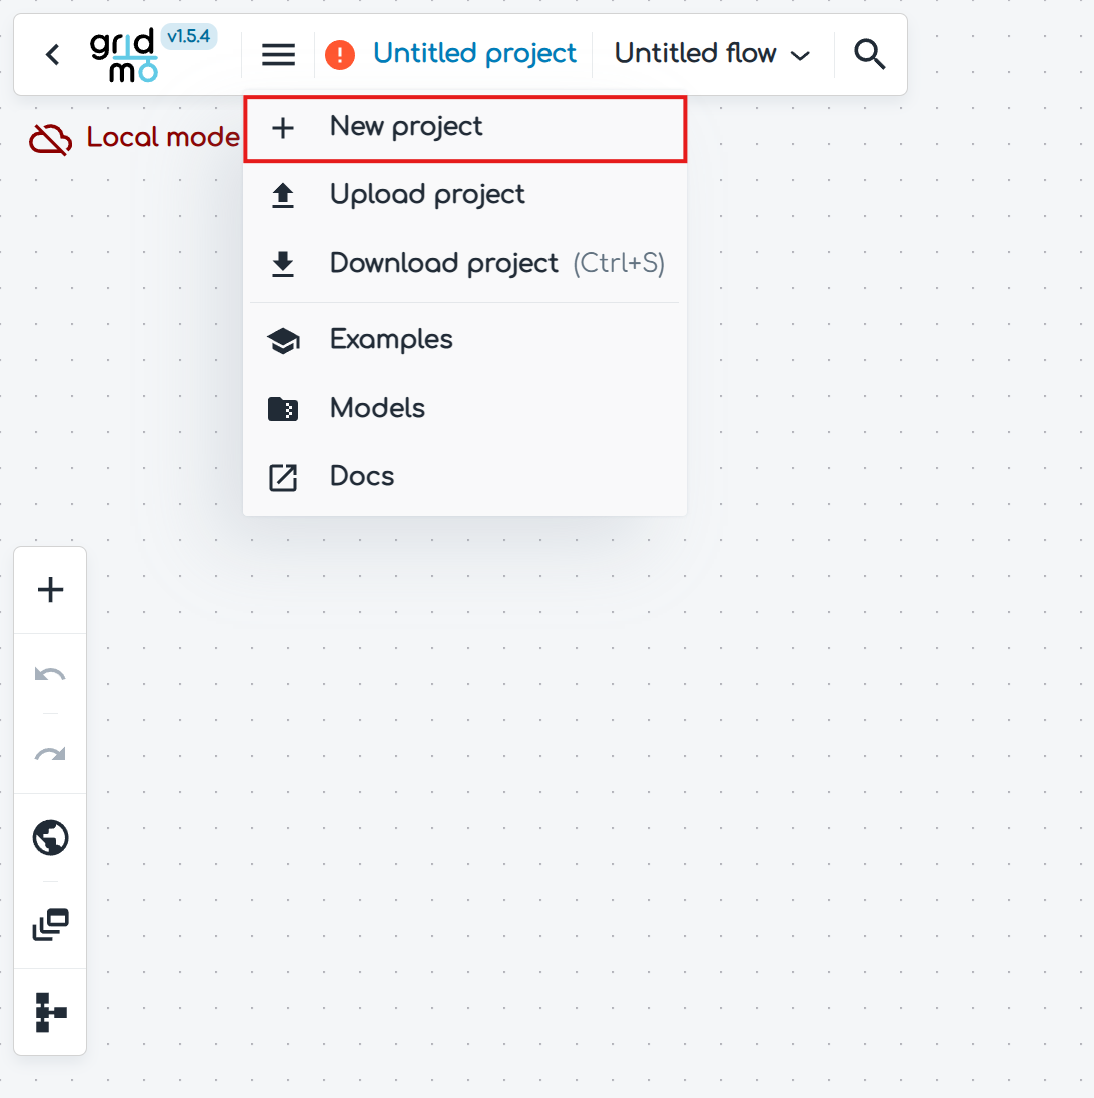
Click on the menu icon and select 'New project' to create a new project.
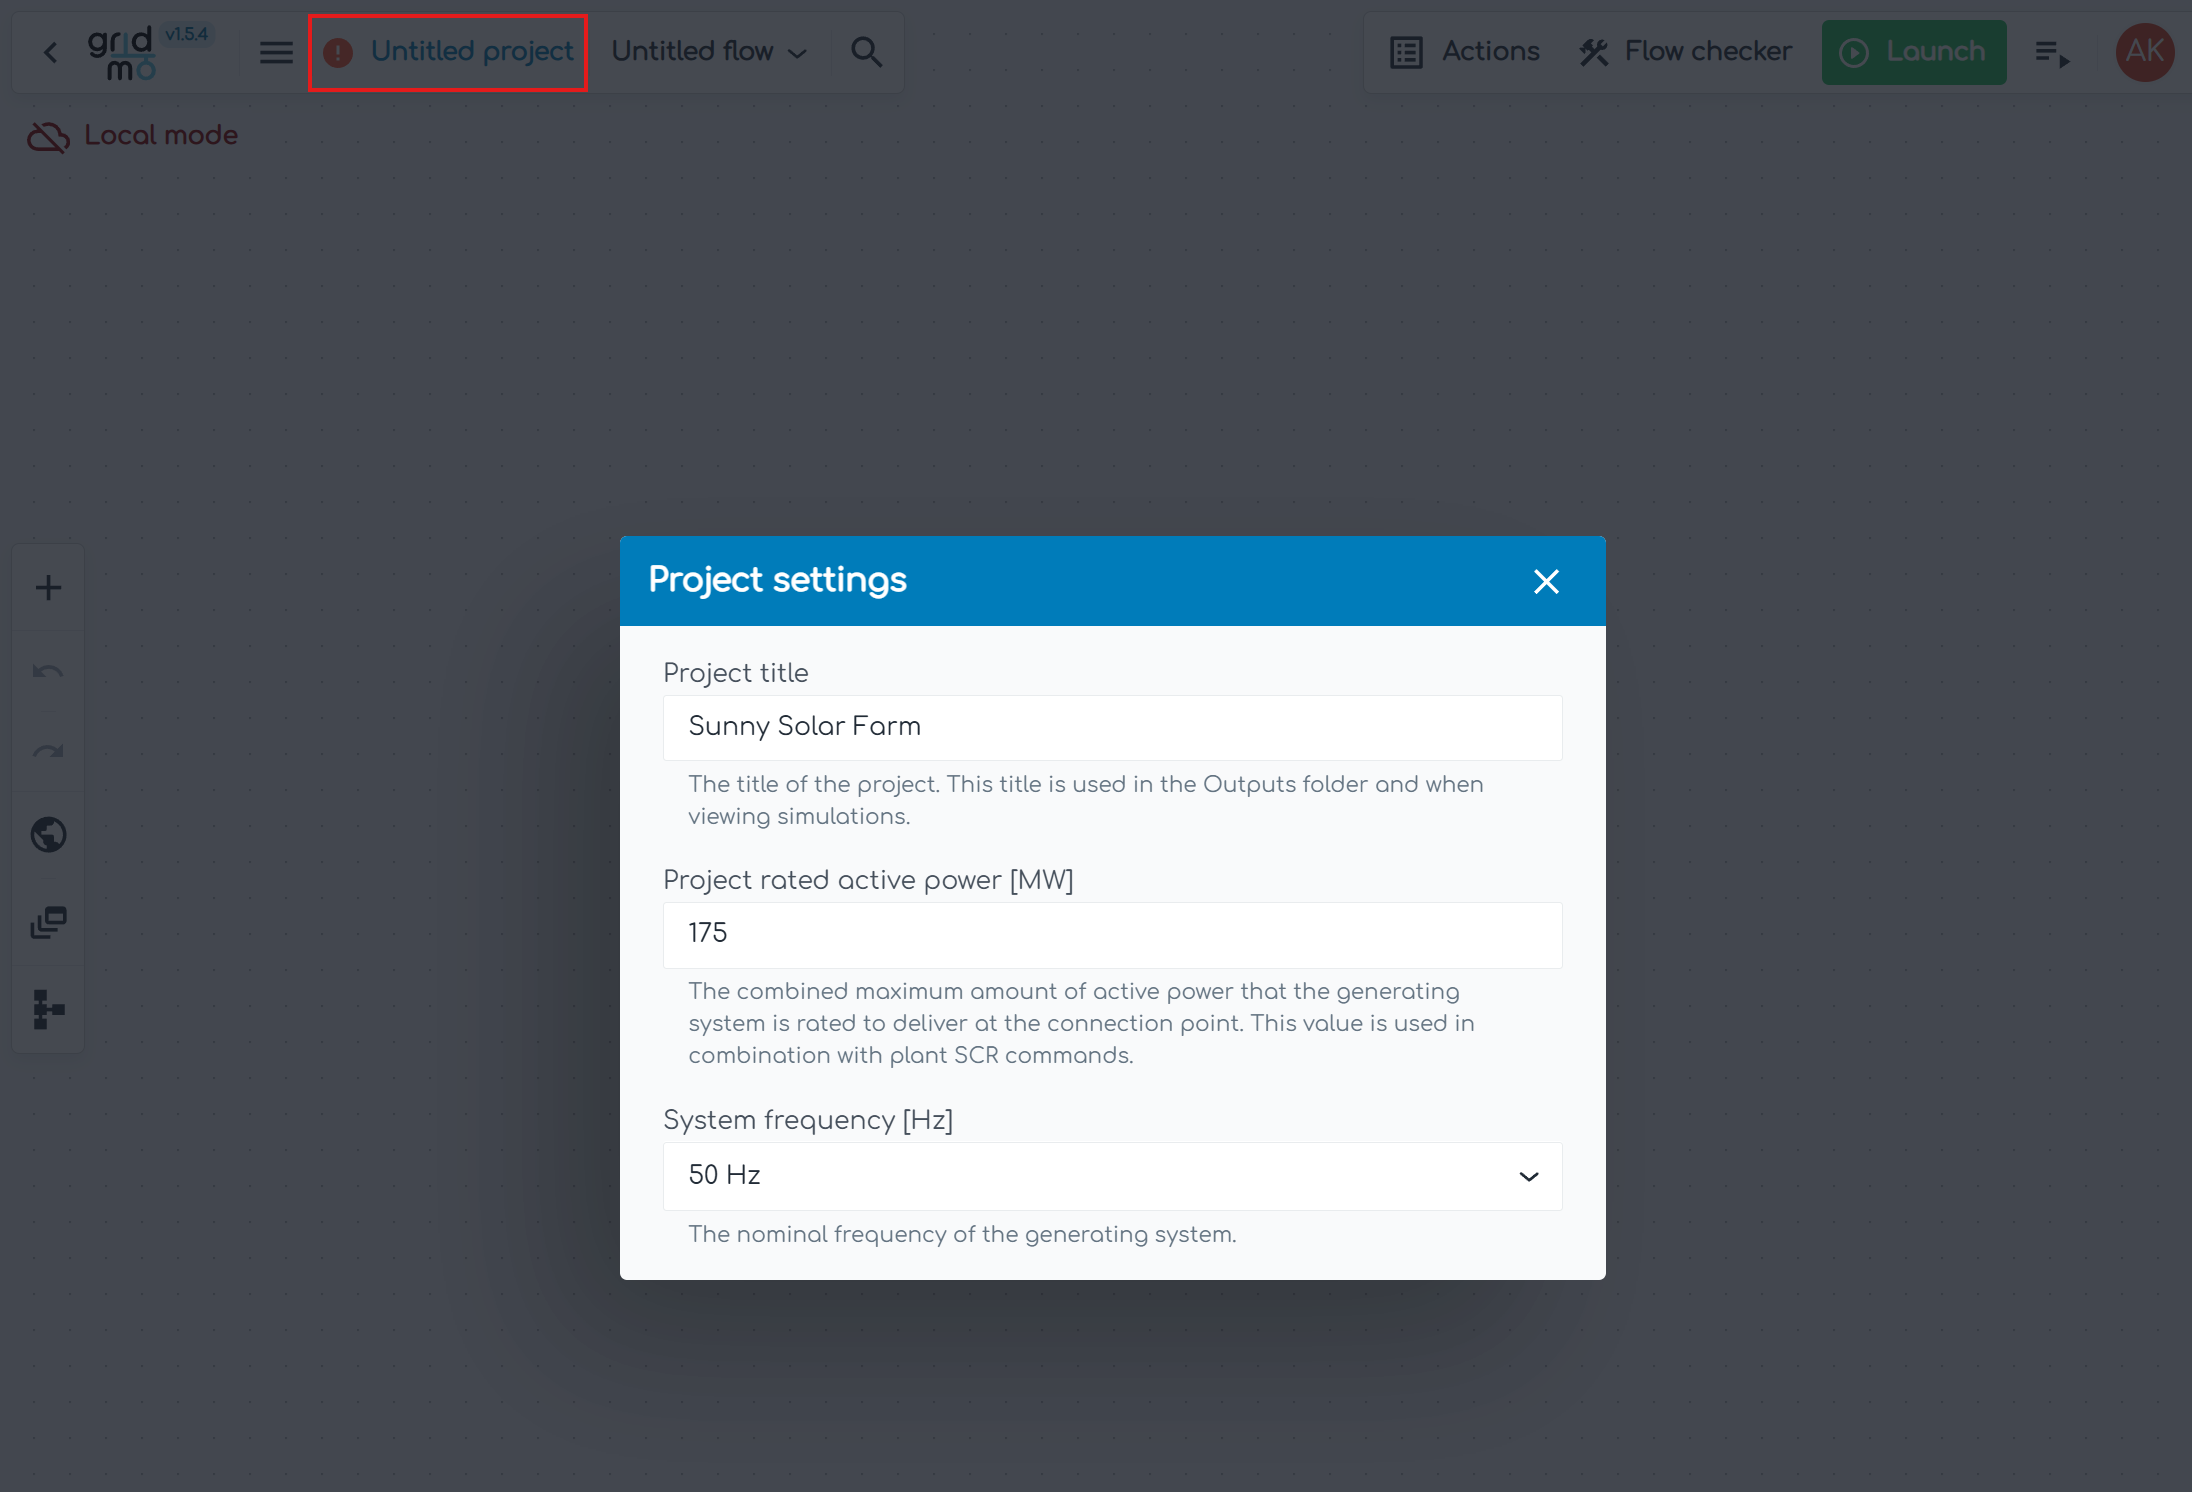
Click on the orange exclamation mark next to the menu icon to configure the project settings.
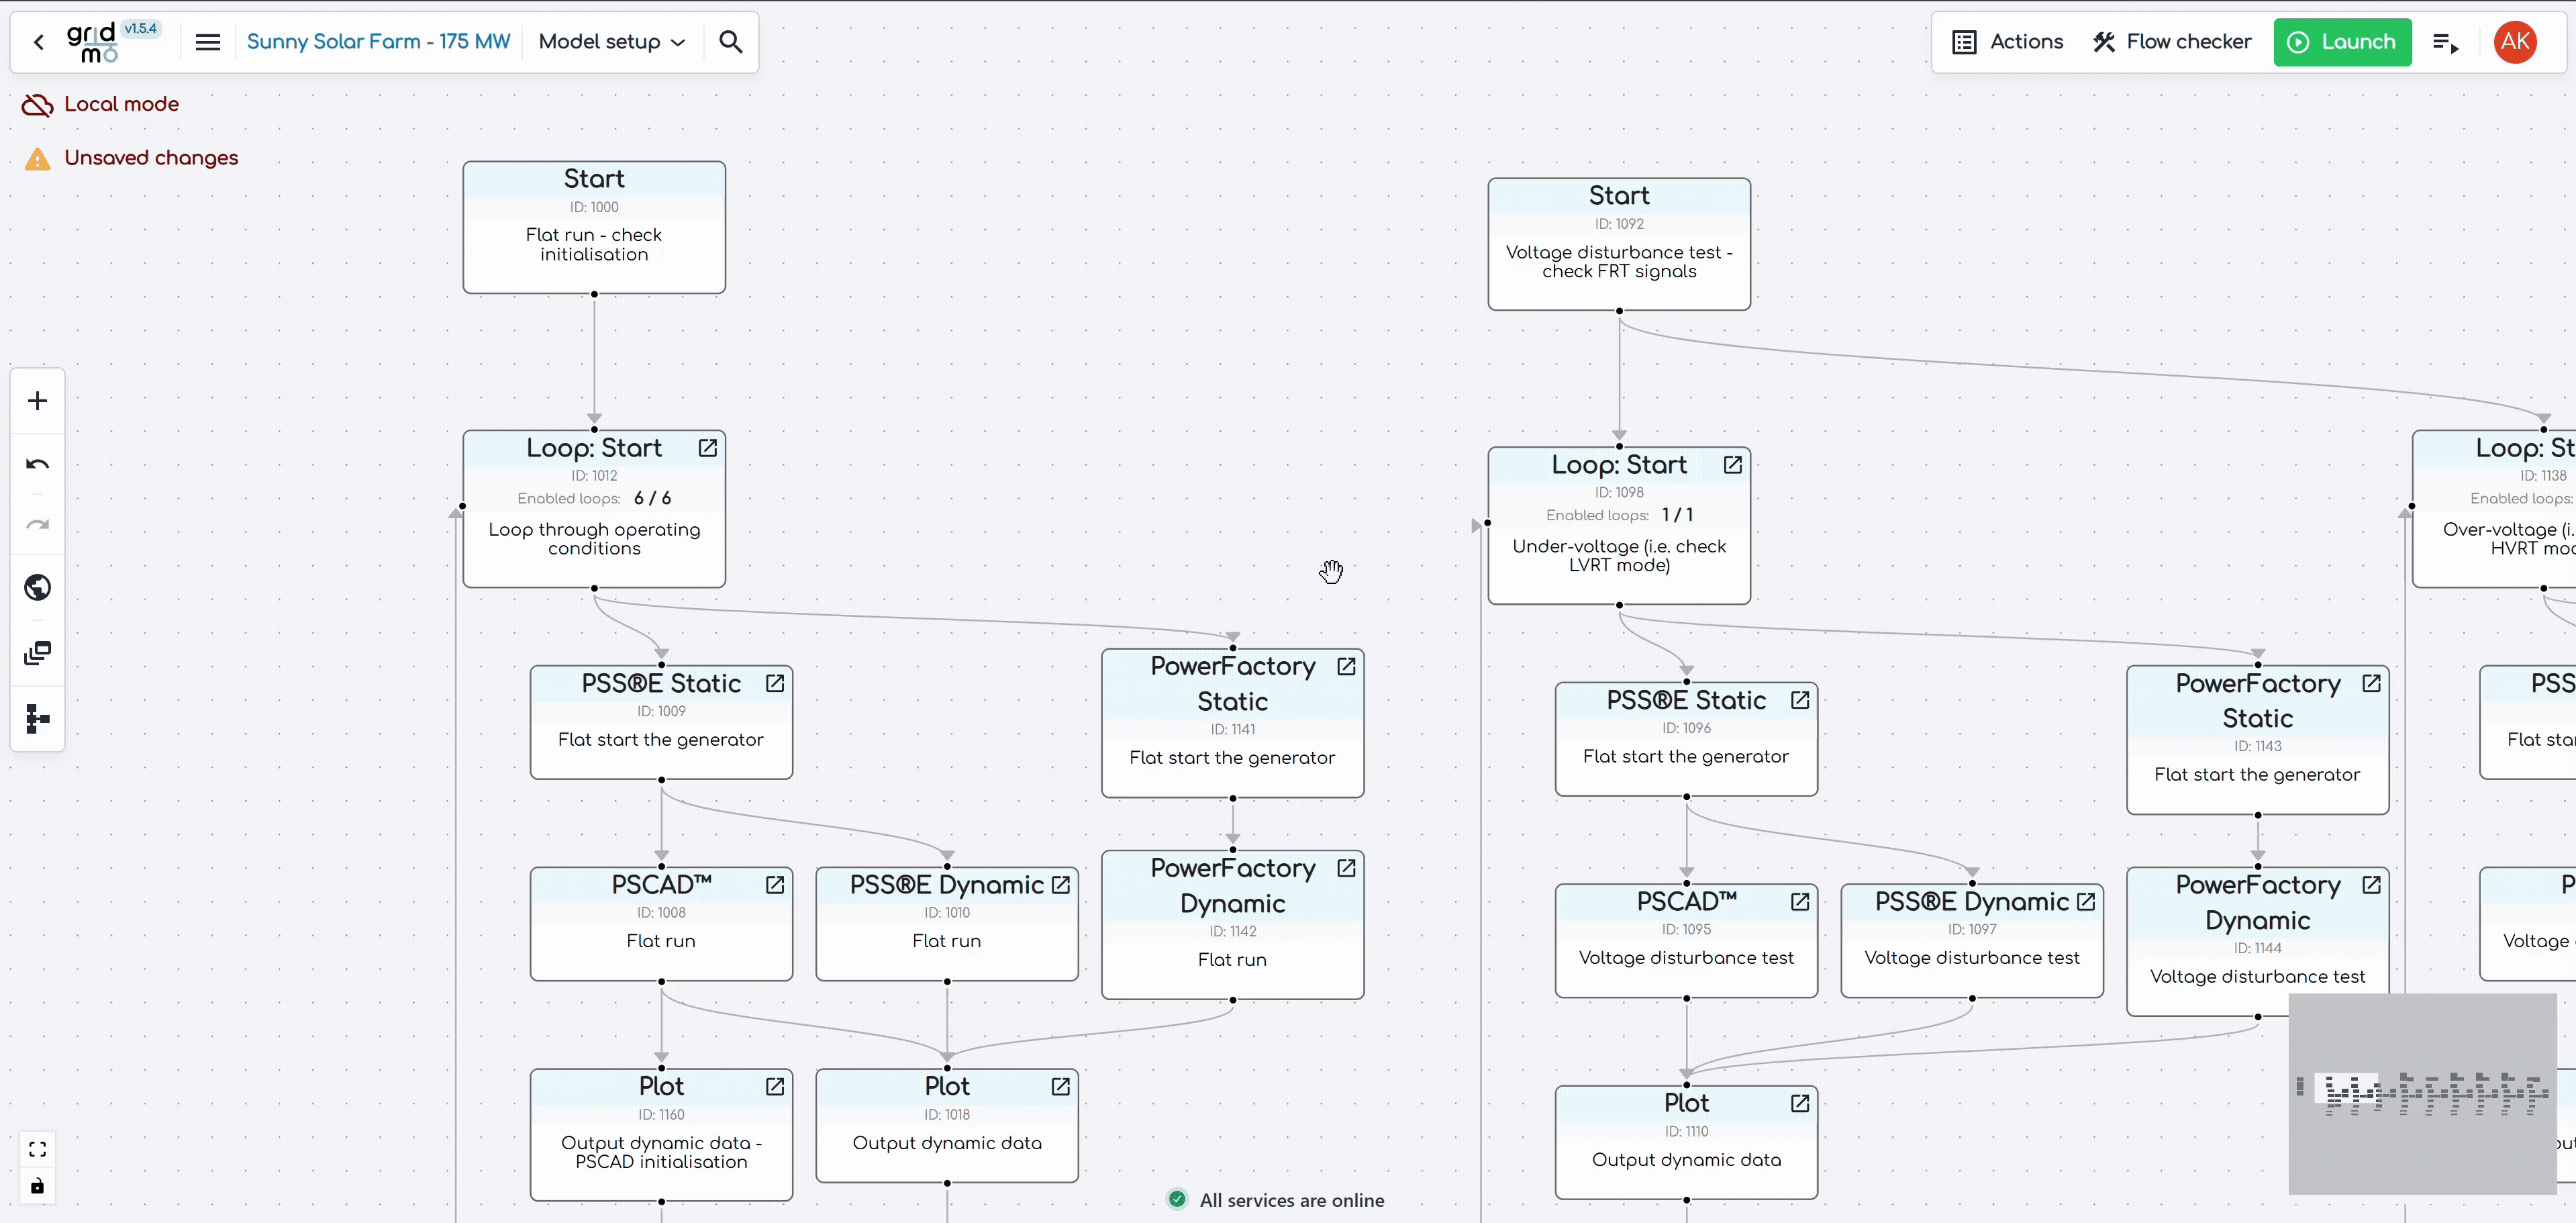
Step 2: Configure model parameters using the Model Setup template
gridmo's Model Setup template includes a minimum number of tests required to confirm that your generating system model has basic functionality and is correctly interfaced with the gridmo platform. Check out this template here: Model Setup.
To add this template to your project, select the 'Untitled flow' dropdown, then click 'Add Flow', select gridmo's Model Setup template and then click 'Add to Project'.
2.1: Configure model folder and file structure
In your inputs folder, create a folder and file structure similar to the below for this project.
Inputs folder
│
└─── <project name>
    │
    └─── v1
        ├─── pscad
        │     <your project's PSCAD™ files>
        │     <any PSCAD™ libraries/dependencies>
        │     <project nickname>.pswx
        ├─── psse
        │     <any libraries (.dlls) required for your models>
        │     <project nickname>.sav
        │     <project nickname>.dyr
        │     <project nickname>.sld
        └─── dpf
              <any libraries (.dlls) required for your models>
              <project nickname>.pfd
Check out our best practices guide on file management.
2.2: Delete unused power systems software Nodes
By default, the template has Nodes for all gridmo supported power systems software (e.g. PSS®E, PowerFactory and PSCAD™). Depending on your specific project requirements, delete the power systems software Nodes you don't require.
The template is configured such that the PSCAD™ Node is initialized from the results of either a PSS®E or PowerFactory Node. The incoming edge may need to be updated based on whether the PSS®E or PowerFactory Node is used for initialization, or whether the PSCAD™ Node is set to calculate the Thévenin equivalent source voltage internally.
2.3: Add smiby and termy into your PSCAD™ model (PSCAD™ only)
To use all Commands and features of the PSCAD™ Node, the smiby and termy blocks need to be added to your PSCAD™ model. The smiby block should be connected at the generating system's connection point, while the termy block(s) are connected to the generating system's generator terminals.
Follow the video below to add smiby into your PSCAD™ model. We recommend using the following channels for smiby:
- Channel 1 = Active power reference, Pref
- Channel 2 = Reactive power reference, Qref
- Channel 3 = Power factor reference, PFref
- Channel 4 = Voltage reference, Vref
- Channel 5 = Source energy reference, SEref
2.4: Add smiby into your PSS®E model (Optional)
PSS®E smiby provides a standardized Thévenin equivalent representation which helps you set up your PSS®E model in gridmo.
2.5: Configure Project Settings and Global Variables
Using the WECC solar default values as a guide, configure the Project Settings and Global Variables to match your specific project requirements. A useful guide with detailed descriptions of the Global Variables can be found here.
2.6: Configure Scenario Variables (Optional)
If your project has multiple operational scenarios (e.g. a BESS project has two scenarios: charging and discharging), create Scenario Variables where appropriate.
If you have more than once scenario (e.g. a BESS, or a hybrid plant, or a solar farm which uses Q-at-night mode) create a Scenario Variable with a description such as (BESS discharging) and use it for the Global Variable scenario_desc.
Step 3: Launch simulation
Once you have configured your project, launch your simulation.
To view your simulation progress and check for errors/warnings related to your project setup, click on the 'View simulations' icon to the right of the launch button and select 'View details'. This is a great place to start for checking if your project has been set up correctly on the gridmo platform.
Step 4: Explore our template library
We provide and maintain a library of templates for different grid codes around the world. Explore our template library to find tests which are relevant to your project.
If you can't find a template which meets your requirements and would like us to make a new one, then please reach out! We'd love to hear from you. Contact us via support.