Template: Overlay Setup
Template version: v1
Country:

ALL
Software required:

How to add this template to your project
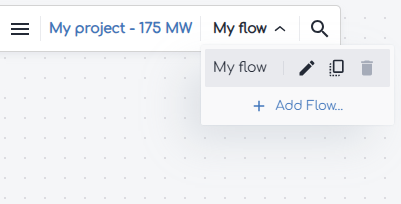
- From within your gridmo project, open the flow dropdown and select 'Add flow'.
- Select the template you want to use and click 'Add to project'.
Background
Overlaying real-world data with simulation results is a crucial part of ensuring generator compliance and model accuracy. Real-world data may come from Hardware-in-the-Loop (HIL) testing, generator commissioning or generator operations monitoring. Typically, a number of standard tests are performed to assess a generator's performance and model accuracy. This template provides examples of the type of tests that may be performed, as well as demonstrating how to use gridmo's Overlay builder tool to overlay real-world data with simulation results.
A sample test procedure has been provided for the following type of tests:
- Active power control - Pref changes
- Reactive power control - Qref changes
- Voltage control - Vref changes
- Power factor control - PFref changes
- Transformer tap position change
- Frequency secondary injection (via playback)
- Plant capacitor switching event
- Network capacitor switching event
- Network fault event (via playback)
- Network switching event
In addition to overlays of real-world data with simulation results for the above tests, the template also contains pre-test simulations which are commonly used to demonstrate the predicted generator performance for each test prior to site testing.
- For Australian projects, the sample test procedure outlined in this template is a possible example of the tests conducted at one hold point level. This template may be used more than once for multiple hold points.
- For each type of test, it is common to prepare different tests with varying steps/scenarios (i.e. varying active power step sizes). For simplicity, we have demonstrated a few examples but you may wish to add more tests depending on your test plan.
By default, this template does not have subplot commands configured within Overlay builder. You may wish to add these for your tests and requirements in the Overlay builder window:

Reference
Common assumptions
- For a majority of tests, we have assumed the active power generation level to be 90% (or 0.9 [p.u.]) of the project rated active power [MW].
- The pre-test simulations are conducted at the initial operating conditions as per the sample test procedure in the sections below. However, note that the simulation results will use the initial operating conditions as per the network conditions during the testing. This is reflected in the sample data where the initial operating conditions purposefully do not match with the pre-test simulations.
- We assume that all real-world data is in a file format which is supported by the Data Node (i.e. .csv or .xlsx). If you have data which is in other formats (e.g. .pqzip), please convert the data into either .csv or .xlsx before using this template.
- This template uses the Global Variables
$site_scrand$site_xrto set the Thévenin equivalent representation of the network conditions. As the SCR and X/R ratio will be dependent on the network configuration on the day of site testing, users will have to calculate these values using the real-world data. This can be done by completing calibration Pref and Qref tests, observing the subsequent changes in Vpoc and back calculating the SCR and X/R ratio. Alternatively, you can use the following gridmo example: How to find the SCR of real-world data.
Active power control - Pref changes
The purpose of these tests is to confirm your generating system's active power control capability. The table below outlines the sample test procedure, as well as the operating conditions under which the pre-test simulation is conducted.
| Description | Procedure | Pre-test simulation initial conditions | Data file name | ||||
|---|---|---|---|---|---|---|---|
| Vpoc | Ppoc | Qpoc | SCR | X/R | |||
| Pref step of -20% (of Pmax) |
| Default POC voltage | 90% of Pmax | 0 | Normal SCR | Normal X/R | WECCsolar_Pstep_HPX_SFPFT_LOC.xlsx |
| Pref step of +20% (of Pmax) | Default POC voltage | 70% of Pmax | 0 | Normal SCR | Normal X/R | ||
As active power steps can take a significant amount of time in real-world data due to low gains and/or ramp rate limits, we have split one test into two overlays (i.e. there are two tests using one data file which contains both the -20% step down and the +20% step up to pre-test level). You can do this for any type of test by creating multiple tests within Overlay builder, loading the same file twice, then analyzing a different section of data.
Reactive power control - Qref changes
The purpose of these tests is to confirm your generating system's reactive power control capability. The table below outlines the sample test procedure, as well as the operating conditions under which the pre-test simulation is conducted.
| Description | Procedure | Pre-test simulation initial conditions | Data file name | ||||
|---|---|---|---|---|---|---|---|
| Vpoc | Ppoc | Qpoc | SCR | X/R | |||
| Qref step of +25% (of reactive power capability) and return to 0 MVAr |
| Default POC voltage | 90% of Pmax | 0 | Normal SCR | Normal X/R | WECCsolar_Qstep1_HPX_SFRPT.xlsx |
| Qref step of -25% (of reactive power capability) and return to 0 MVAr |
| Default POC voltage | 90% of Pmax | 0 | Normal SCR | Normal X/R | WECCsolar_Qstep2_HPX_SFRPT.xlsx |
Voltage control - Vref changes
The purpose of these tests is to confirm your generating system's voltage control capability. The table below outlines the sample test procedure, as well as the operating conditions under which the pre-test simulation is conducted.
| Description | Procedure | Pre-test simulation initial conditions | Data file name | ||||
|---|---|---|---|---|---|---|---|
| Vpoc | Ppoc | Qpoc | SCR | X/R | |||
| Vref step of +3% and then -3% (±0.03 pu) |
| Default POC voltage | 90% of Pmax | 0 | Normal SCR | Normal X/R | WECCsolar_Vstep1_HPX_SFVCT.xlsx |
| Vref step of -3% and then +3% (±0.03 pu) |
| Default POC voltage | 90% of Pmax | 0 | Normal SCR | Normal X/R | WECCsolar_Vstep2_HPX_SFVCT.xlsx |
Power factor control - PFref changes
The purpose of these tests is to confirm your generating system's power factor control capability. The table below outlines the sample test procedure, as well as the operating conditions under which the pre-test simulation is conducted.
| Description | Procedure | Pre-test simulation initial conditions | Data file name | ||||
|---|---|---|---|---|---|---|---|
| Vpoc | Ppoc | Qpoc | SCR | X/R | |||
| PFref step to 0.99 capacitive, then back to 1.0 |
| Default POC voltage | 90% of Pmax | 0 | Normal SCR | Normal X/R | WECCsolar_PFstep1_HPX_SFPFT.xlsx |
| PFref step to 0.99 inductive, then back to 1.0 |
| Default POC voltage | 90% of Pmax | 0 | Normal SCR | Normal X/R | WECCsolar_PFstep2_HPX_SFPFT.xlsx |
The power factor reference step of 0.99 capacitive/inductive has been chosen arbitrarily and does relate to the reactive power reference step tests.
Transformer tap position change
The purpose of these tests is to confirm the operation of your generating system transformer's tap changer. The table below outlines the sample test procedure, as well as the operating conditions under which the pre-test simulation is conducted.
| Description | Procedure | Pre-test simulation initial conditions | Data file name | ||||
|---|---|---|---|---|---|---|---|
| Vpoc | Ppoc | Qpoc | SCR | X/R | |||
| Tap position up one step |
| Default POC voltage | 90% of Pmax | 0 | Normal SCR | Normal X/R | WECCsolar_TXstep1GEN_HPX_SFTXT.xlsx WECCsolar_TXstep1POC_HPX_SFTXT.xlsx |
| Tap position down one step |
| Default POC voltage | 90% of Pmax | 0 | Normal SCR | Normal X/R | WECCsolar_TXstep2GEN_HPX_SFTXT.xlsx WECCsolar_TXstep2POC_HPX_SFTXT.xlsx |
WECC solar model does not currently support transformer tap changing in PSCAD™ and PowerFactory, hence this test is conducted in PSS®E only.
Frequency secondary injection (via playback)
The purpose of these tests is to confirm your generating system's operation during frequency disturbances. This test is typically completed using secondary injection testing of a test frequency signal. The table below outlines the sample test procedure, as well as the operating conditions under which the pre-test simulation is conducted.
| Description | Procedure | Pre-test simulation initial conditions | Data file name | ||||
|---|---|---|---|---|---|---|---|
| Vpoc | Ppoc | Qpoc | SCR | X/R | |||
| Frequency ramp up to 50.1 Hz, then down to 50 Hz |
| Default POC voltage | 90% of Pmax | 0 | Normal SCR | Normal X/R | WECCsolar_FreqPLBstep1_HPX_SFFCT.xlsx |
| Frequency ramp down to 49.9 Hz, then up to 50 Hz |
| Default POC voltage | 50% of Pmax | 0 | Normal SCR | Normal X/R | WECCsolar_FreqPLBstep2_HPX_SFFCT.xlsx |
Plant capacitor switching event
The purpose of these tests is to confirm your generating system's operation during a capacitor switching event. The table below outlines the sample test procedure, as well as the operating conditions under which the pre-test simulation is conducted.
| Description | Procedure | Pre-test simulation initial conditions | Data file name | ||||
|---|---|---|---|---|---|---|---|
| Vpoc | Ppoc | Qpoc | SCR | X/R | |||
| Switch plant capacitor in and out |
| Default POC voltage | 90% of Pmax | 0 | Normal SCR | Normal X/R | WECCsolar_PlantCapSwitchGEN_HPX_SFCAP WECCsolar_PlantCapSwitchPOC_HPX_SFCAP.xlsx |
WECC solar model does not currently have a capacitor modelled in PSCAD™ and PowerFactory, hence this test is conducted in PSS®E only.
Network capacitor switching event
The purpose of these tests is to confirm your generating system's operation during a network capacitor switching event. This test is typically completed in coordination with a utility where they will switch a capacitor bank (or similar) at a nearby substation. The table below outlines the sample test procedure, as well as the operating conditions under which the pre-test simulation is conducted.
| Description | Procedure | Pre-test simulation initial conditions | Data file name | ||||
|---|---|---|---|---|---|---|---|
| Vpoc | Ppoc | Qpoc | SCR | X/R | |||
| Switch network capacitor in |
| Default POC voltage | 90% of Pmax | 0 | Infinite SCR | N/A | WECCsolar_NetworkCapSwitch_HPX_SFCST.xlsx |
| Switch network capacitor out | Default POC voltage | 90% of Pmax | 0 | Infinite SCR | N/A | ||
In simulation, this test is performed by applying an overvoltage disturbance to replicate the effects of a network capacitor switching in.
When using Overlay builder for the plant and network capacitor switching tests in this template, one data file was used for multiple overlay tests (i.e. switch capacitor in, and switch capacitor out). You can do this for any type of test by creating multiple tests within Overlay builder, loading the same file twice, then analyzing a different section of data.
The tests below do not have pre-test simulations or a sample test procedure as they are typically not part of any pre-defined commissioning tests. This is because utilities typically don’t want to purposefully create network events which could increase system security risk or damage equipment. However, if such events occur on the network and recording is triggered as part of generator operations monitoring, then it is common to complete an overlay.
Two examples have been provided which outline a single network event (e.g. a network fault). However, it is more realistic that network events will include a combination of events. For example, a network fault is followed by a network switching event because a line has been disconnected to clear the fault. In these instances, you may need to simulate multiple events in the model to complete the overlay.
Network fault event (via playback)
The purpose of this test is to confirm your generating system's operation during voltage disturbances (e.g. a nearby network fault). The table below outlines the operating conditions to be used for performing the simulations.
| Description | Vpoc | Ppoc | Qpoc | SCR | X/R | Data file name |
|---|---|---|---|---|---|---|
| Network fault of 0.62 pu residual for a duration of 220 ms | As per real-world data | As per real-world data | As per real-world data | Infinite SCR | N/A | WECCsolar_Network_FaultEvent.xlsx |
To set the voltage at the connection point, the simulation is conducted at infinite SCR which allows the Thévenin equivalent voltage source to 'force' the connection point voltage to the desired value from the real-world data.
We have assumed that the voltage disturbance is applied in the model by using a Thévenin equivalent voltage source playback of the real-world data connection point voltage. However, for very deep faults (e.g. 10% Vpoc residual voltage) we don’t recommend using this playback methodology since it has been known to cause unrealistic and undesirable generating systems responses in the model. If your network event is a very deep fault, we recommend using the VDISTURBANCE Command instead.
Network switching event (via SCR change)
The purpose of this test is to confirm your generating system's operation during network switching events (e.g. a line outage). The table below outlines the operating conditions to be used for performing the simulations.
| Description | Vpoc | Ppoc | Qpoc | SCR | X/R | Data file name |
|---|---|---|---|---|---|---|
| Network switching event causing SCR and X/R to change from maximum (normal) to minimum | As per real-world data | As per real-world data | As per real-world data | As per real-world data | As per real-world data | WECCsolar_Network_SwitchingEvent.xlsx |
Sources
Revision history
Version 1 | 30 September 2025
- First release.